Bathrooms and kitchens tend to accumulate the most grime during these busy and chaotic periods, which is why it’s been so incredibly helpful for me to develop my own homemade bathroom cleaner to remove soap scum and grime.
I can’t tell you how many circumstances in my home life forced me to put deep housecleaning on the back burner.
With four children (one with special needs), pets, and a husband who has traveled for work over the years, I often find myself overwhelmed by the varying needs and schedules of my family, especially when a sickness has descended upon us.
What I Look for in a Homemade Bathroom Cleaner
I chose this specific DIY bathroom cleaner recipe because of my personal preference for effective simplicity.
Previously, I scoured Pinterest and various “crunchy mom” blogs for homemade cleaners, only to find recipes calling for expensive or hard-to-find ingredients.
What I needed was a recipe using affordable ingredients on hand.
Thankfully, I eventually found a recipe with common ingredients and the ability to be versatile (i.e. a multi-surface cleaner).

Honestly, I was shocked and excited by the results—so much so I performed for my baby the same little happy dance for this homemade bathroom cleaner as I did for my stain-fighting concoction for removing urine stains and smells out of our guest mattress.
Both are super easy to mix, and their results are nothing short of amazing.
DIY Bathroom Cleaner Ingredients
A heavy-duty cleaning or gardening spray bottle
1 Cup White Vinegar (Heated)
1 Tablespoon Dawn Blue Liquid Dish Soap
Homemade Bathroom Cleaner Directions
Step 1: Heat the vinegar on the stove top until hot (NOT boiling) or use your microwave for 60 seconds or less (avoiding a boil).
Pour the hot vinegar into the spray bottle.
Step 2: Add the tablespoon of Dawn dish soap or its equivalent to the spray bottle.
Tip: To avoid a vinegar-y smell, use lavender-, citrus-, or tropical-scented dish soap.
Regardless, the smell will be rather strong, so consider opening a window or running a fan—just as I did.
Step 3: Shake gently.
Step 4: Spray the mixture immediately and liberally onto the intended surface.
Because of the heated vinegar, this cleaning solution needs to be used right after preparation, otherwise it will eventually clog the sprayer due to a residue developed by the soap and the acidity of the vinegar as it cools.
Only make the amount you need.
Discard the rest and thoroughly rinse your sprayer with hot water afterward.
If the surface is grimy from extended periods of dirt or soap scum, then let the concoction sit for 10 to 30 minutes before taking the fifth step.
Step 5: Use a wet sponge to wipe the grime. Prepare yourself for the shock of how easily it washes away.
Step 6: Pin this post on Pinterest or share it on Facebook.
You never know which one of your mom friends are in need of an affordable, simplistic, but highly-effective DIY bathroom cleaner.
My Personal Experience With This DIY Bathroom Cleaner
One time, after my children and I had come down with a particularly aggressive sickness while my husband was away for work, I realized that the shower and tub in my master bathroom were very dirty.
This was the first time I used this DIY bathroom cleaner solution.
I sprayed the mixture on half of my tub and let it sit for about thirty minutes.
Then, I grabbed my sponge and turned on the water.
I did not have to scrub hard like I normally do with that much dirt and soap scum; the soap scum and dirt washed away easily.
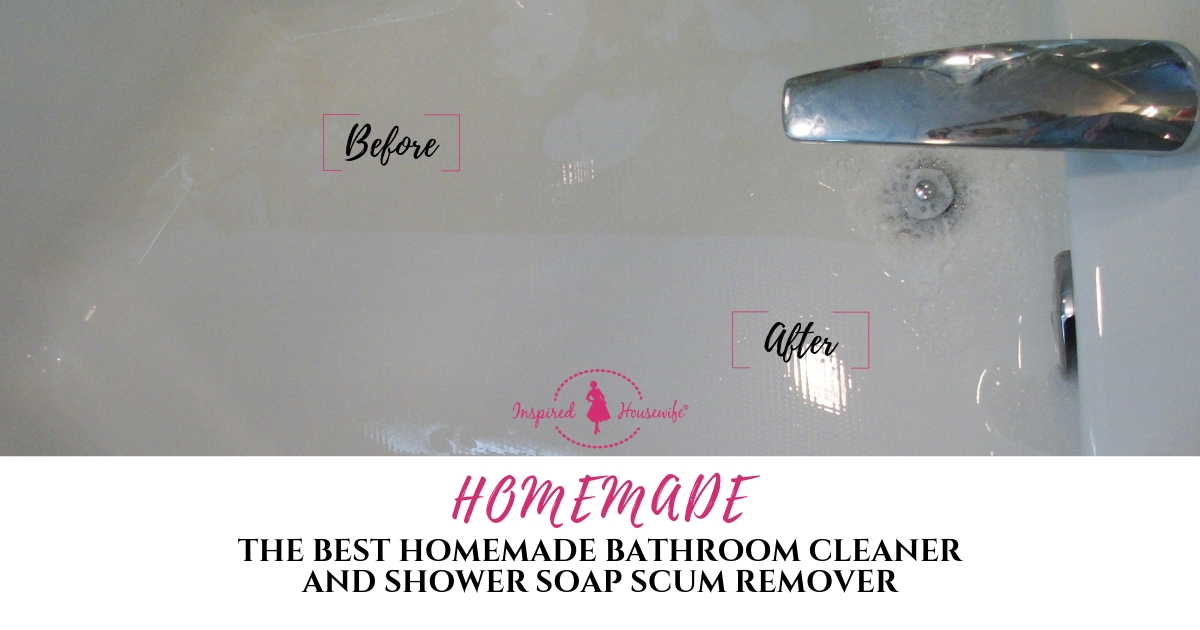
Clearly, these photos tell the story. As you can see, the difference is quite unbelievable.
My tub surface (on the left) was so shiny and clean you could see the reflection of the light above.
My shower was disgusting, and it too cleaned up nicely.
Aside from the tub and shower, I also used this mixture to clean my sinks and the nasty stains on my vinyl bathroom floor.
I have yet to find a more effective DIY bathroom cleaner scum remover recipe, which is why I encourage others to try it.
As a warning, please do not use this mixture on porous surfaces.
I noticed one person on Pinterest commented on a pin for this recipe. She claimed she ruined her black marble shower by using this.
I’m not sure why this happened, but as always please ensure whatever the surface is you test it in an inconspicuous area.
You’ll want to watch for any undesired changes.
Conclusion
One of the greatest parts of this recipe is you can make a lot of it cheaply, and the best part of all is it WORKS!
This is the most effective homemade scum remover I ever tried.
Give this recipe a chance and let me know what you think in the comments below!
Advice and suggestions for recipe improvement are also welcome! 🙂
