Table of Contents
I was hosting my first dinner party as a newlywed when disaster struck. My husband’s boss had just complimented our beautiful white dining room chairs when his wife accidentally knocked over her full glass of red wine. The deep burgundy liquid spread across the cream fabric like spilled blood, and I watched my confidence as a hostess drain away with it.
Standing there with eight pairs of eyes watching me, I had no idea how to remove stains effectively. I grabbed a wet paper towel and started scrubbing frantically, which only made the stain bigger and darker. By the time our guests left, I was convinced those chairs were ruined forever. That humiliating evening taught me that knowing how to remove stains properly isn’t just about cleaning; it’s about saving your belongings, your money, and sometimes your dignity.
Three years and countless stain disasters later, I’ve learned that most stains can be completely eliminated if you know the right techniques and act quickly. The key to successful stain removal isn’t expensive products or professional services; it’s understanding what you’re dealing with and using the correct method for each specific type of stain.
Why Learning How to Remove Stains Properly Matters
The average household deals with over 200 staining incidents per year, from minor spills to major disasters. Professional stain removal services charge $50 to $200 per item, while complete replacement of stained furniture, carpets, or clothing can cost thousands of dollars. However, knowing how to remove stains yourself can save up to 90% of seemingly ruined items.
The science behind stain removal is fascinating and practical. Different stains require different approaches because they’re made of different molecular structures. Protein-based stains like blood respond to cold water and enzymes, while oil-based stains need heat and detergents. Understanding these principles helps you choose the right method every time.
Time is critical when learning how to remove stains effectively. Fresh stains are exponentially easier to remove than set-in stains because the staining molecules haven’t had time to bond permanently with fabric or surface fibers. Within the first few minutes, most stains can be completely eliminated with basic household items.
Signs You Need Better Stain Removal Skills
You might think stain removal is just common sense, but certain signs indicate you need to improve your techniques. If you’ve ever made a stain worse by trying to clean it, thrown away items because of stains, or spent money on professional cleaning that didn’t work, you need better stain removal knowledge.
Watch for these common mistakes: using hot water on protein stains, rubbing instead of blotting, applying the wrong cleaning agent, or giving up too quickly on set-in stains. These errors often make stains permanent when they could have been completely removed with proper techniques.
Many people also don’t recognize that different surfaces require different approaches. How to remove stains from carpet differs significantly from removing stains from upholstery, clothing, or hard surfaces. Using the wrong method for the surface can cause damage beyond just the original stain.
Root Causes of Staining Disasters
Most staining disasters happen because people panic and use the first cleaning method that comes to mind, usually scrubbing with whatever’s handy. This instinctive response often pushes stains deeper into fibers or spreads them over larger areas.
Another major cause of staining failures is not identifying the stain type before attempting removal. Each category of stain requires specific treatment, and using the wrong approach can actually set the stain permanently. Oil-based stains treated with water-based solutions, or protein stains treated with hot water, become much harder to remove.
Many people also don’t understand that stain removal is often a multi-step process requiring patience and persistence. Expecting instant results leads to aggressive scrubbing or using harsh chemicals that damage surfaces while failing to remove the stain effectively.
How to Remove Stains: 8 Proven Methods
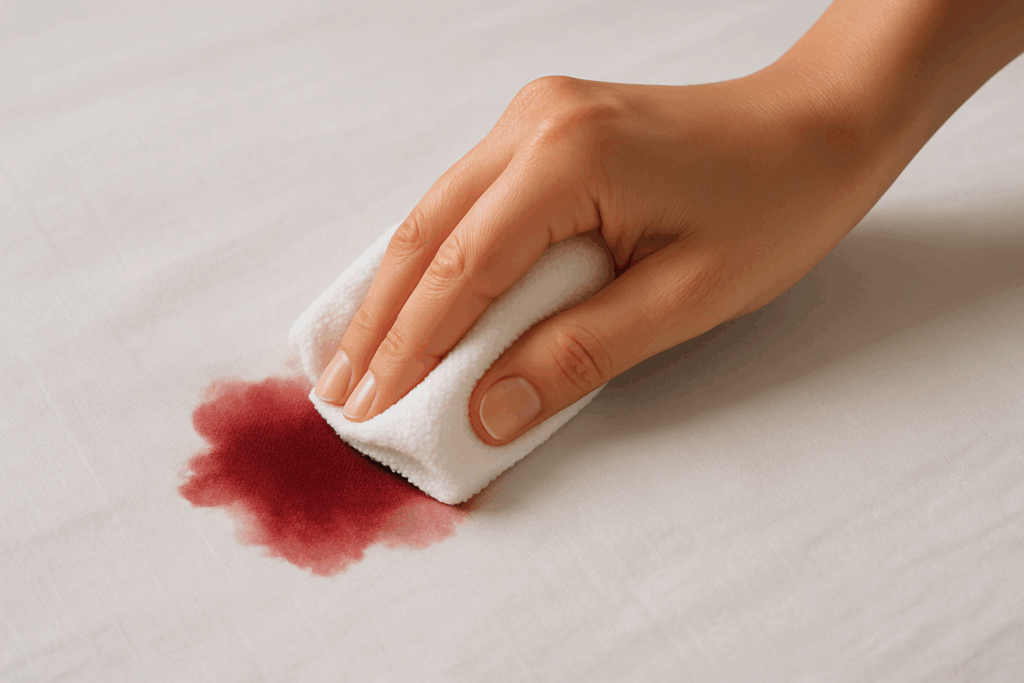
Method 1: Blood Stain Elimination
Blood stains are protein-based and respond best to cold water and enzymatic action. Never use hot water on blood as it will cook the proteins and set the stain permanently. The key to how to remove stains involving blood is acting quickly and using the right temperature.
For fresh blood stains, immediately flush with cold water from the back of the fabric to push the blood out rather than through the fibers. Apply hydrogen peroxide directly to the stain and let it bubble for 30 seconds before blotting with a clean cloth. The bubbling action breaks down the blood proteins naturally.
For set-in blood stains, create a paste with cold water and meat tenderizer (which contains natural enzymes). Apply the paste and let it sit for 30 minutes before rinsing with cold water. Alternatively, soak the item overnight in cold salt water; salt helps break down protein bonds.
On carpets or upholstery, mix one tablespoon liquid dish soap with two cups cold water. Apply the solution, blot gently, and rinse with clean water. Never rub or scrub blood stains as this pushes them deeper into fibers and makes removal much more difficult.
Method 2: Red Wine Disaster Recovery
Red wine stains seem catastrophic but are actually quite manageable if you know how to remove stains containing tannins. The secret is acting immediately and using the right combination of absorption and neutralization techniques.
Immediately blot up as much wine as possible with clean paper towels or cloth. Don’t rub or press hard; just absorb what you can. Pour white wine or club soda over the stain to dilute the red wine and help lift it from the fibers. The carbonation in club soda provides gentle agitation that helps release the stain.
For stubborn wine stains, mix equal parts hydrogen peroxide and liquid dish soap. Apply this mixture to the stain and let it sit for one minute before blotting with a clean cloth. The hydrogen peroxide breaks down the tannin compounds while the soap helps lift them away.
Salt is another powerful tool for fresh wine stains. Pour a generous amount of salt over the wet stain and let it absorb the wine for several minutes. The salt draws the liquid out of the fabric fibers. Vacuum up the salt and treat any remaining stain with the hydrogen peroxide solution.
Method 3: Grease and Oil Stain Removal
Grease and oil stains require a completely different approach than water-based stains. Learning how to remove stains that are oil-based means understanding that you need to dissolve the oil rather than dilute it with water.
For fresh grease stains, immediately sprinkle cornstarch, baby powder, or baking soda over the entire stain. These powders absorb the oil before it can penetrate deeply into fibers. Let the powder sit for at least 15 minutes, then vacuum or brush it away.
Apply liquid dish soap directly to the remaining stain. Dish soap is specifically designed to cut through grease and oil. Work the soap into the stain gently with your fingers, then rinse with the hottest water safe for the fabric. Unlike protein stains, grease stains respond well to heat.
For set-in grease stains, apply a paste made from baking soda and dish soap. Let this mixture sit for several hours or overnight before washing. The baking soda provides abrasive action while the soap dissolves the oil. WD-40 can also remove stubborn grease stains; spray it on, let it sit for 30 minutes, then treat with dish soap.
Method 4: Ink Stain Solutions
Ink stains vary widely depending on the type of ink, making identification crucial for successful removal. How to remove stains from ballpoint pens differs from removing fountain pen ink or marker stains, but several universal techniques work across ink types.
Rubbing alcohol is the most effective general ink remover. Apply it directly to the stain and blot with a clean cloth. The alcohol dissolves most ink compounds and evaporates quickly, preventing spreading. For stubborn ink stains, let the alcohol sit for several minutes before blotting.
Hairspray containing alcohol also works effectively on ink stains. Spray it directly on the stain, let it sit for one minute, then blot with a clean cloth. The alcohol in hairspray breaks down ink while the other ingredients help lift it from fibers.
For water-based ink like fountain pen ink, flush immediately with cold water. Apply liquid laundry detergent directly to the stain and let it sit for five minutes before washing. Milk is surprisingly effective on fresh ink stains because the proteins bind with the ink compounds and help lift them away.
Method 5: Paint Stain Removal
Paint stains require different approaches depending on whether the paint is water-based or oil-based. Latex paint is water-based and easier to remove, while oil-based paints require solvents. Knowing how to remove stains from both types saves countless items from the trash.
For fresh latex paint, immediately flush with cold water to remove as much paint as possible. Apply liquid laundry detergent directly to the stain and work it in gently with an old toothbrush. The detergent breaks down the paint binders while the water dilutes the pigments.
Oil-based paint requires turpentine or paint thinner for removal. Apply the solvent to a clean cloth and blot the stain from the outside toward the center to prevent spreading. Work in small sections and use fresh cloth frequently to avoid redistributing the paint.
For dried paint stains, try scraping off as much paint as possible with a dull knife or credit card. Apply rubbing alcohol to soften the remaining paint, then scrape again. Repeat this process until no more paint can be removed mechanically, then treat with the appropriate solvent based on paint type.
Method 6: Rust Stain Treatment
Rust stains are actually iron oxide deposits that require acid-based solutions for removal. Commercial rust removers work well, but common household items are equally effective and safer. Learning how to remove stains caused by rust prevents permanent orange discoloration on fabrics and surfaces.
Lemon juice and salt create a powerful natural rust remover. Sprinkle salt over the rust stain, then squeeze fresh lemon juice over the salt. Let this mixture sit for several hours in direct sunlight if possible. The citric acid in lemon juice dissolves rust while the salt provides mild abrasive action.
White vinegar is another effective rust remover. Soak the stained area in undiluted white vinegar for several hours, then scrub gently with an old toothbrush. For stubborn rust stains, heat the vinegar slightly before applying, but test on an inconspicuous area first to ensure it won’t damage the material.
Cream of tartar mixed with lemon juice forms a paste that works exceptionally well on rust stains. Apply this paste to the stain and let it sit for 30 minutes before scrubbing gently and rinsing. This combination is particularly effective on white fabrics where other rust removers might cause discoloration.
Method 7: Makeup Stain Removal
Makeup stains combine oil-based and pigment components, requiring specific techniques for complete removal. Different makeup products need different approaches, but understanding how to remove stains from cosmetics saves clothing and prevents waste from discarded items.
Foundation and concealer are primarily oil-based and respond well to makeup remover or micellar water. Apply the makeup remover to a cotton pad and blot the stain gently. Follow up with liquid dish soap to remove any remaining oil residue, then rinse with warm water.
Lipstick stains are notoriously difficult because they contain waxes, oils, and intense pigments. Scrape off excess lipstick with a dull knife, then apply rubbing alcohol to dissolve the oils and pigments. Blot with a clean cloth and repeat until no more color transfers to the cloth.
Mascara and eyeliner require petroleum-based solvents for removal. Baby oil or petroleum jelly applied to the stain will dissolve these products effectively. Work the oil into the stain gently, then remove with dish soap and warm water. This method works particularly well on waterproof makeup products.
Method 8: Mystery Stain Investigation
The most challenging stains are those you can’t identify, but systematic investigation usually reveals the best removal method. How to remove stains when you don’t know what caused them requires detective work and testing different approaches safely.
Start by determining if the stain is water-based or oil-based. Apply a drop of water to an inconspicuous area of the stain. If the water beads up, the stain is likely oil-based. If the water absorbs readily, it’s probably water-based. This simple test guides your initial treatment approach.
Smell can provide valuable clues about stain composition. Sweet smells often indicate sugar-based stains, sour smells suggest protein-based stains, and chemical odors point to synthetic stains requiring solvent treatment. Visual appearance also helps: shiny stains are usually oil-based, while flat stains are typically water-based.
Begin with the gentlest method first. Apply cold water and blot to see if the stain responds. If not, try liquid dish soap, then rubbing alcohol, then hydrogen peroxide, testing each method on a small area first. This progression moves from mildest to strongest treatments while minimizing potential damage.
Implementation: Building Your Stain Removal Arsenal
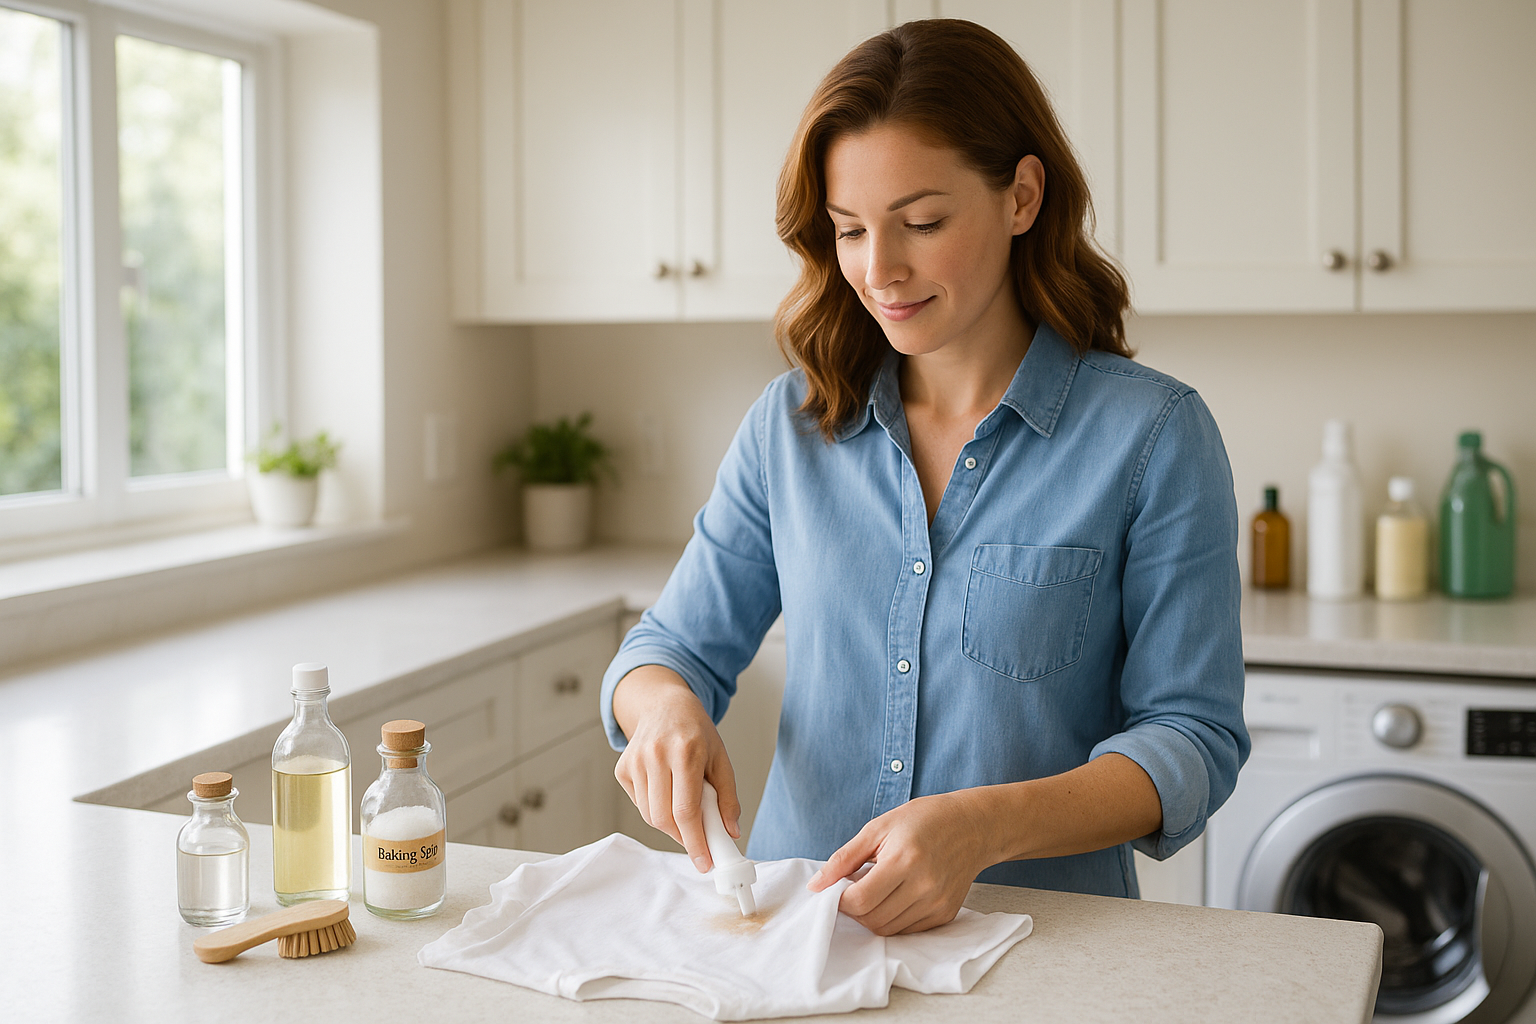
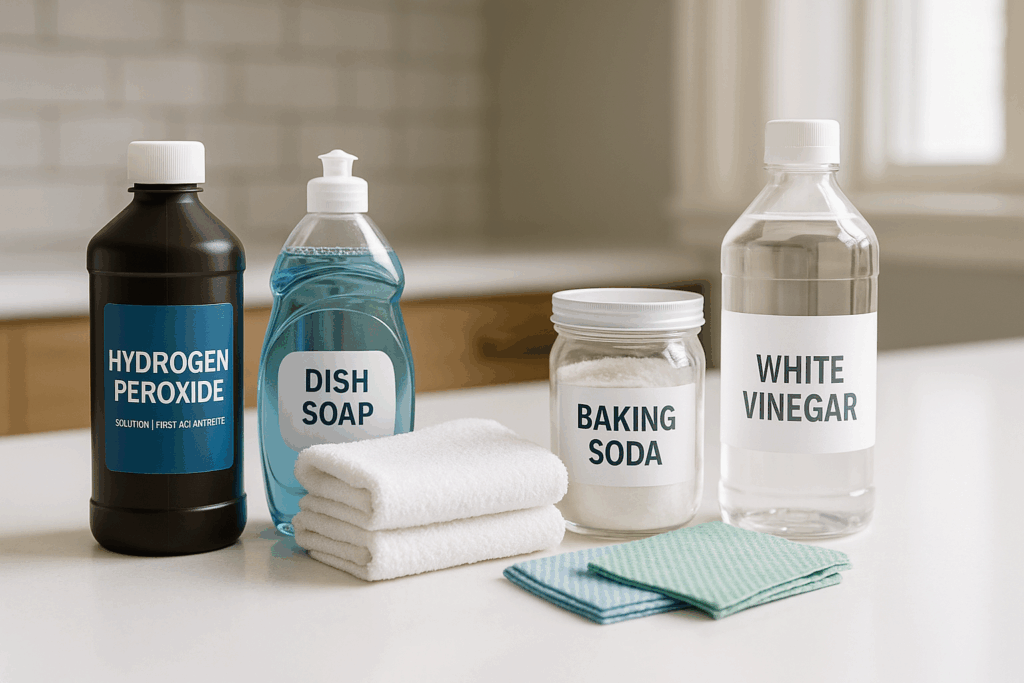
Creating an effective stain removal kit doesn’t require expensive specialized products. Most effective stain removers are common household items that you probably already own. Learning how to remove stains successfully depends more on technique and timing than on costly commercial products.
Stock your stain removal arsenal with these essentials: white vinegar, hydrogen peroxide, rubbing alcohol, liquid dish soap, baking soda, salt, lemon juice, and clean white cloths or paper towels. These items handle 95% of staining situations effectively and safely.
Keep your stain removal supplies easily accessible in a designated container. Stain removal success depends heavily on quick action, so having everything readily available makes the difference between successful removal and permanent staining. Label your container clearly so family members can find it quickly during emergencies.
Troubleshooting Common Stain Removal Mistakes
The biggest mistake people make when learning how to remove stains is using too much force or the wrong motion. Rubbing and scrubbing push stains deeper into fibers and spread them over larger areas. Always blot from the outside of the stain toward the center, using clean sections of cloth for each blot.
Another common error is using hot water inappropriately. While heat helps with some stains like grease, it sets protein-based stains permanently. When in doubt, start with cold water and increase temperature only if appropriate for the specific stain type.
Many people also give up too quickly on stain removal. Some stains require multiple treatments or extended soaking time for complete removal. Patience and persistence often succeed where quick attempts fail. However, always test treatment methods on inconspicuous areas first to prevent damage.
Over-treating stains is another frequent problem. Using too much cleaning product or leaving treatments on too long can damage fabrics or surfaces. Follow recommended concentrations and timing, and remember that gentle repeated treatments are more effective than harsh single applications.
Daily Integration: Making Stain Prevention and Quick Response Habits
The best stain removal strategy is preventing stains whenever possible through smart daily habits. Treat clothing and fabrics with stain protection products, use coasters and placemats consistently, and keep stain removal supplies in multiple locations for quick access.
Develop immediate response habits for when stains occur. The first 60 seconds are crucial for successful stain removal, so train yourself and family members to act quickly rather than procrastinate. Blot immediately, avoid rubbing, and apply appropriate first aid treatments right away.
Regular maintenance prevents many stains from becoming permanent. Check frequently for early signs of staining on furniture, carpets, and clothing. Address minor discoloration immediately rather than waiting until it becomes a major problem requiring aggressive treatment.
Make stain removal knowledge a family skill rather than just one person’s responsibility. Teaching children how to remove stains safely gives them valuable life skills while reducing the household stain burden. Even young children can learn to blot spills immediately and call for help with appropriate treatment.
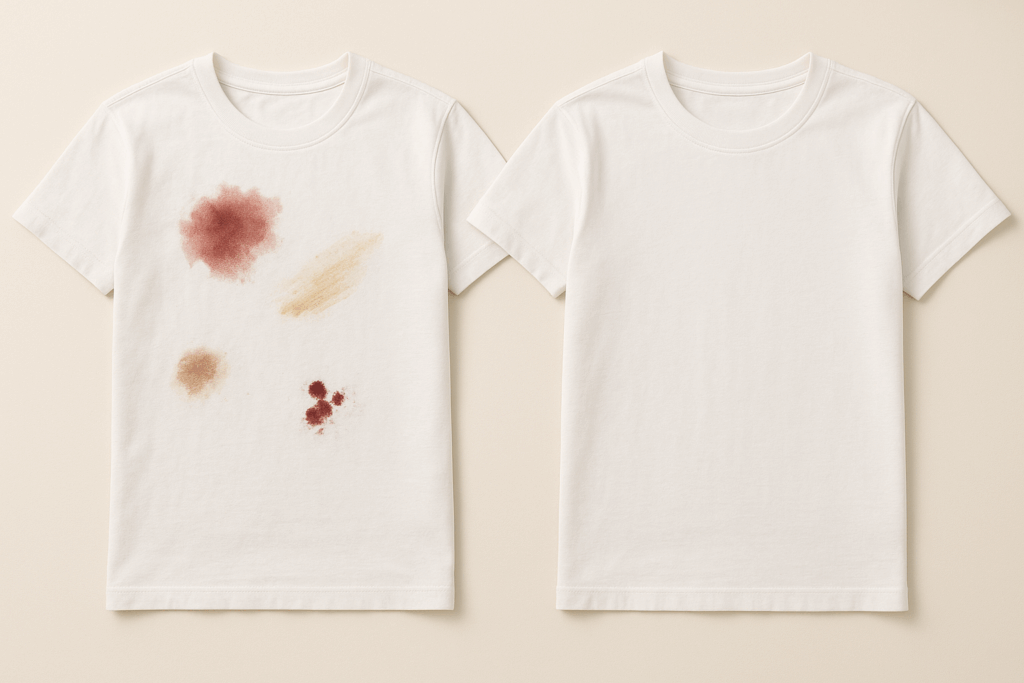
Mastering how to remove stains transforms you from someone who fears spills and accidents into someone who handles them confidently and effectively. These eight methods cover the vast majority of staining situations you’ll encounter, potentially saving thousands of dollars in replacement costs while extending the life of your belongings. Remember that successful stain removal combines the right technique with quick action and appropriate persistence, turning potential disasters into minor inconveniences.